
20 White & Pink Falling Flower Petal Photo Overlays Free Download A collection of 20 flower petal Photo Overlays to add to your designs and photos. Are a versatile set of overlays that add a touch of beauty to your images.
With 20 overlays featuring delicate white and pink flower petals, they bring a soft and romantic vibe to your photos. Enhance your portraits, wedding shots, or nature photography with these lovely overlays.You Can Also Download 41 Falling Rose Petals Photo Overlays
Included in this set:
• 20 .PNG Photo Overlays – white and delicate pink, apple and cherry blossom photo overlays (transparent backgrounds)
• High resolution (5100 x 3450 px – 300 dpi)
• Compatible with any software that allows you to work with layers (Photoshop, Photoshop Elements, Paint Shop Pro, etc).
Software Compatibility:
.PNG files will work with most graphic software.
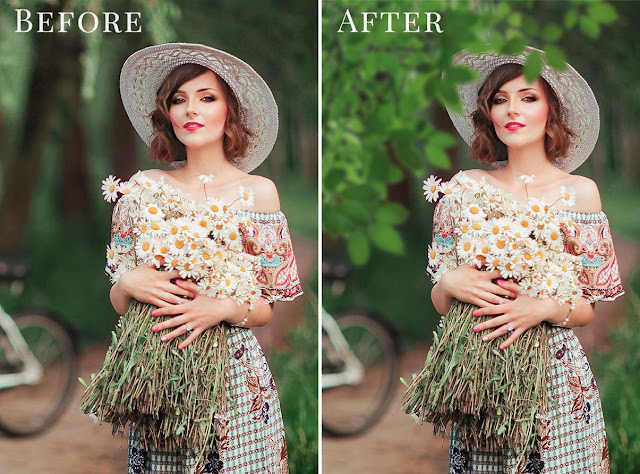
See what you will be able to do
Below you can find Preset Power Examples from each Package.
Download the File Easily From the Download Link Given Below
Password is: dgpik.com
How to Use Overlays
- Understand the Overlay Concept: Familiarize yourself with the concept of overlays. Overlays are separate layers of content that can be placed on top of a base image or video. They can be images, text, shapes, animations, or even videos themselves. Overlays are typically transparent or semi-transparent, allowing the underlying content to show through.
- Choose an Appropriate Software: Depending on your specific needs, choose software that supports overlays. Popular choices include Adobe Photoshop, Adobe Premiere Pro, OBS Studio, and Canva. Different software may have different interfaces and specific steps, but the basic principles remain the same.
- Prepare Your Base Content: Before adding overlays, ensure you have your base image or video ready. This will be the underlying content onto which you’ll place the overlays.
- Create or Find Overlays: Next, gather or create the overlays you want to use. These can be images, graphics, text elements, or animations. You can either create them yourself using graphic design software or find pre-made overlays from various online resources.
- Open Your Editing Software: Launch your chosen software and open the project or file you’re working with. Import your base content and overlays into the software. Make sure you have separate layers for the base content and each overlay.
- Arrange Layers: In the software, arrange the layers so that the base content is at the bottom and the overlays are stacked on top. You can usually do this by dragging and dropping the layers in the software’s layer panel.
- Position and Resize Overlays: Select each overlay layer and adjust its position and size as desired. You can typically do this by using the transformation tools (e.g., move, resize, rotate) provided by the software. Preview the result to ensure the overlays are placed correctly.
- Customize Overlay Properties: Depending on your software, you may have various options to customize the appearance of overlays. This can include adjusting transparency, blending modes, color correction, text formatting, or applying effects. Experiment with these options to achieve the desired look.
- Preview and Fine-tune: Regularly preview your project to see how the overlays interact with the base content. Make any necessary adjustments to the overlay properties or their placement to achieve the desired visual effect.
- Save or Export: Once you’re satisfied with the overlay arrangement, save your project or export the final result. Choose the appropriate file format and settings based on your intended use, such as JPEG, PNG, or video formats.
Remember, the exact steps may vary depending on the software you’re using, so it’s always recommended to refer to the software’s documentation or online tutorials for specific instructions.